
In-app recording guide
Hey! We designed Letterly to be intuitive, so you probably don't need a guide. But if you like to explore and don't want to miss anything, here's a quick tour. 😊
Part 1
Four steps to your first note
Step 1. Download Letterly
Get Letterly for iPhone from the App Store.
- One subscription covers all your devices — phone, computer, tablet.
- Notes sync automatically — start on your phone, continue on your computer.
- Up to 90 minutes per note, with unlimited notes and total recording time.
Step 2. Log in
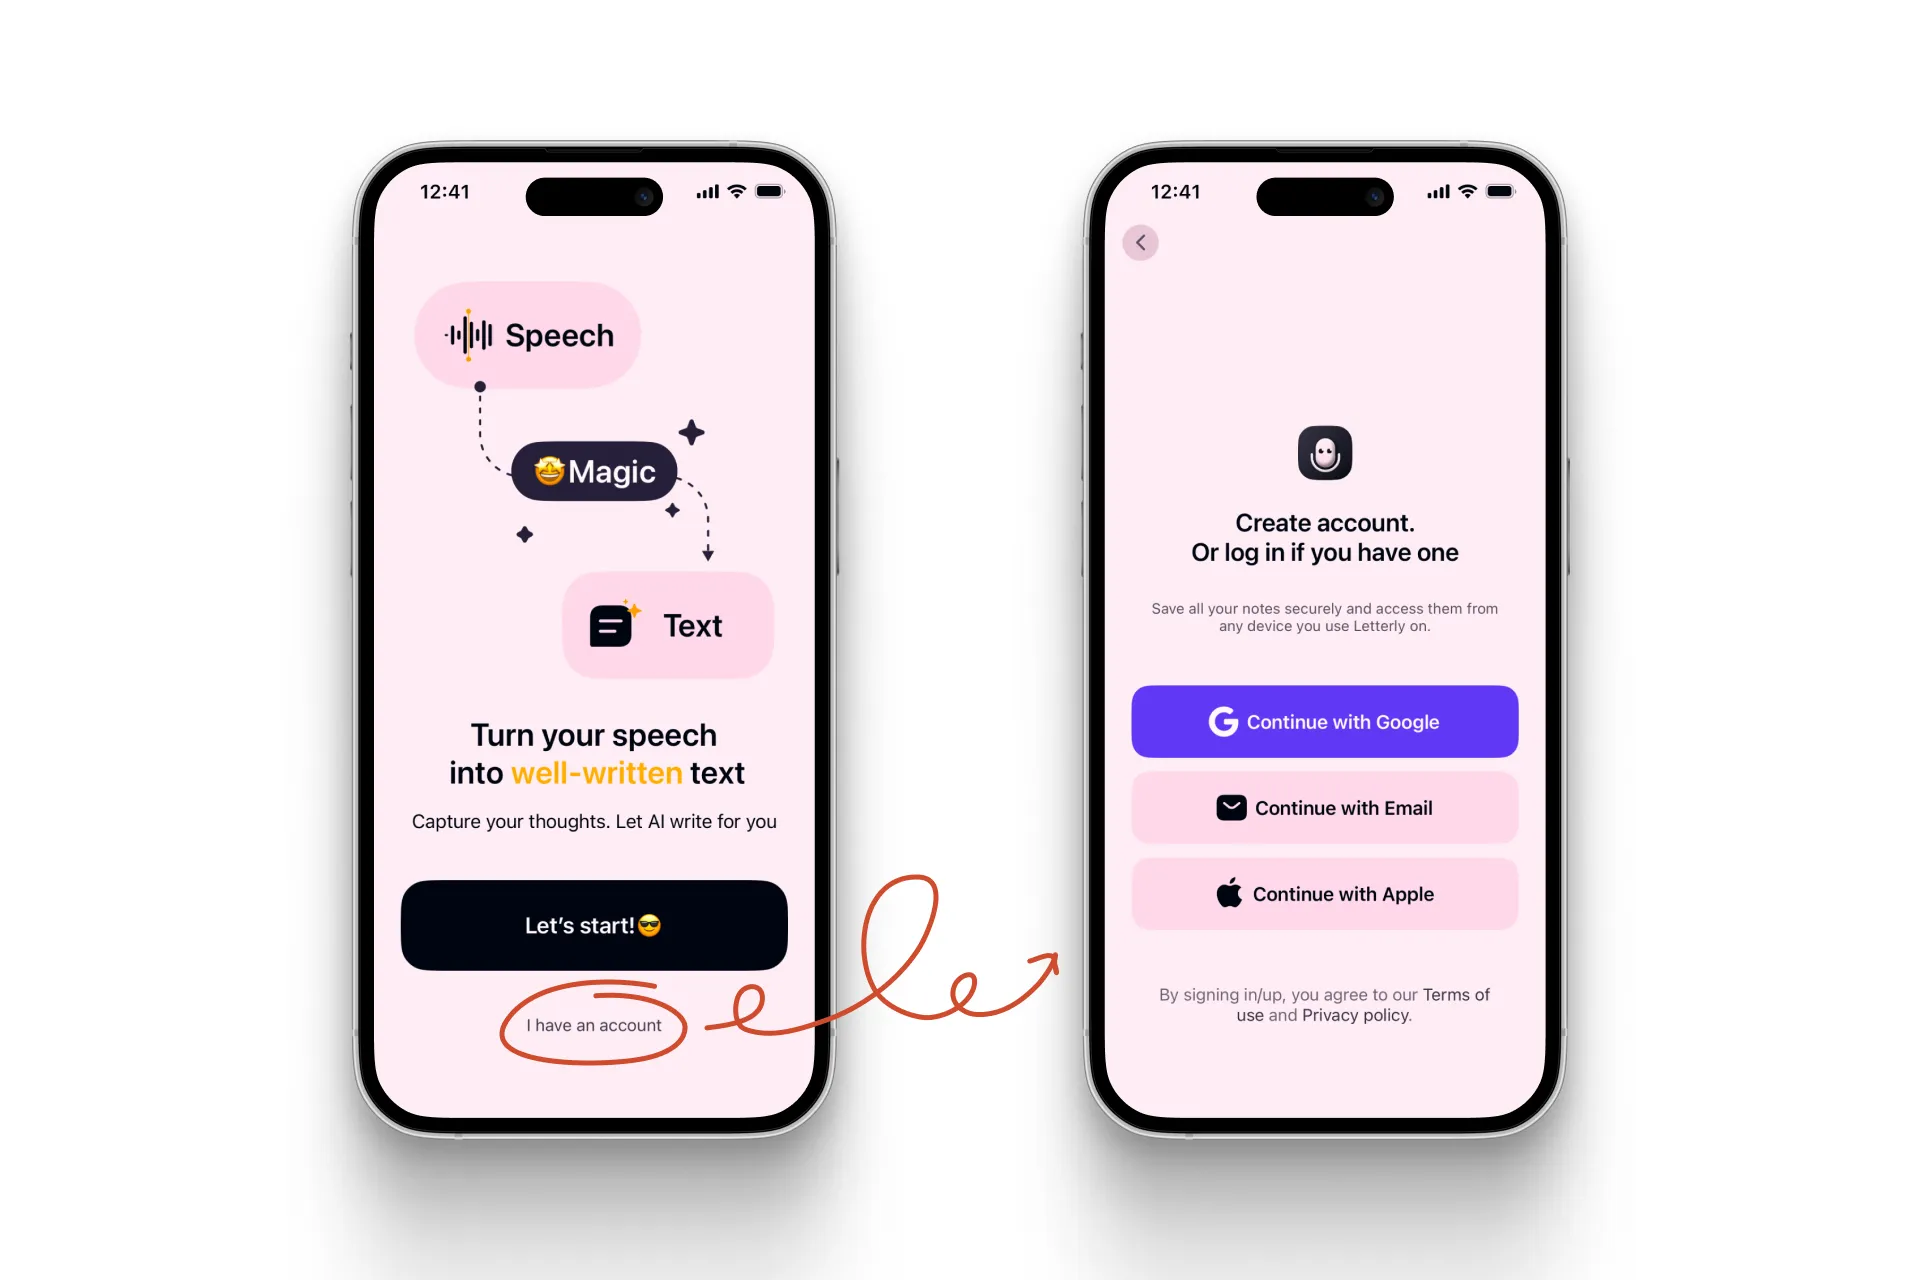
Open the app, tap I have an account and choose a method. Log in with the same email you used when you purchased the app.
- Google — tap Continue a couple of times.
- Apple — when asked to Share or Hide your email, choose Share.
- Email — tap Continue with Email. We send a magic link and a 6-digit code to your inbox, and you can use either one.
With Continue with Email you have two ways in:
- Use the magic link — tap Sign in to Letterly in the email.
- Enter the code manually — on the Check your email screen, tap Enter code manually and type the 6-digit code.
- The link and the code are valid for 15 minutes, so finish the login right away.
- Each of them can be used only once. If you have already used one, request a new one in the app.
- Open the link or enter the code on the same device you started the login from.
Step 3. Record your first note
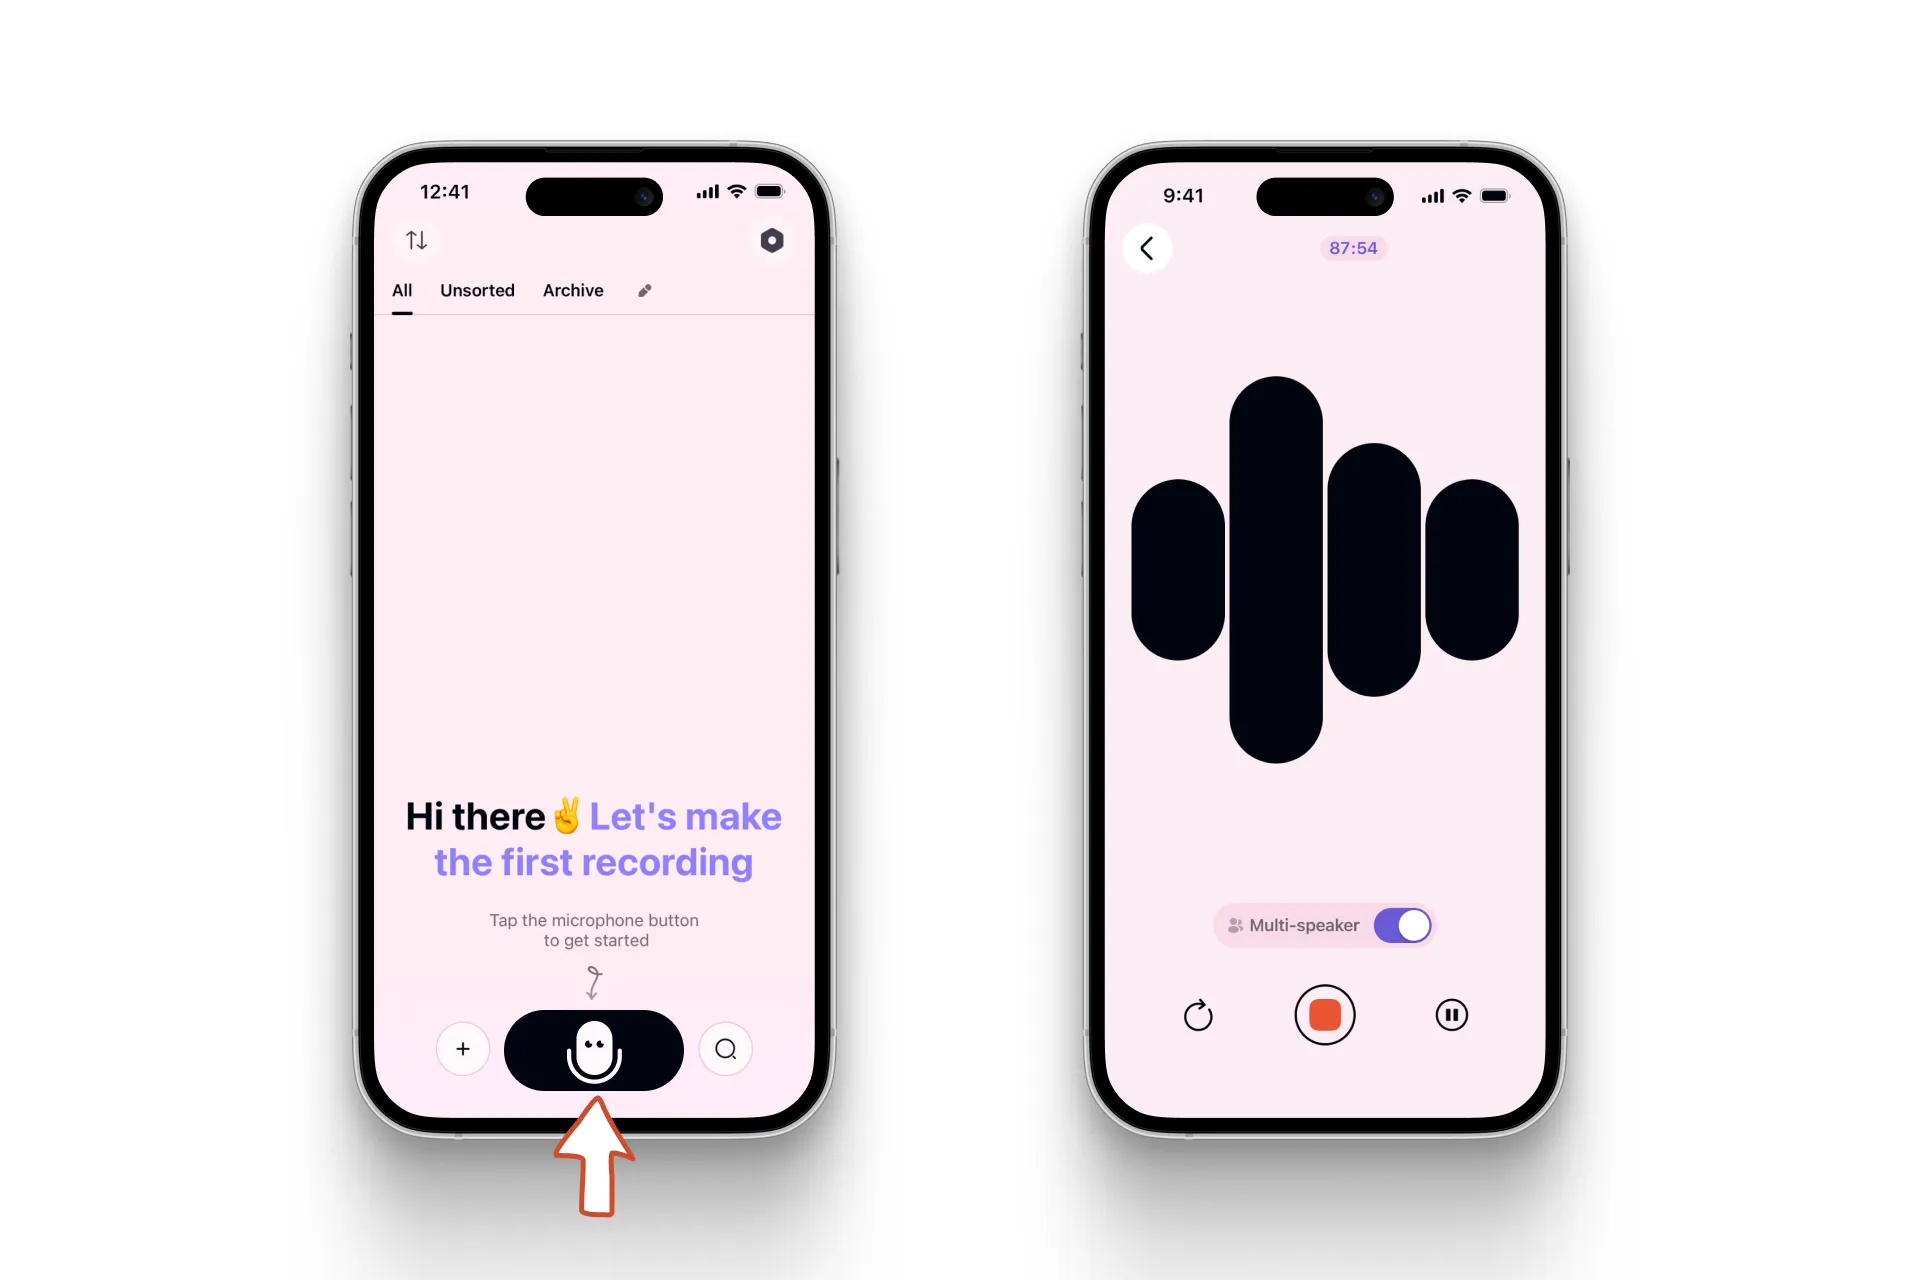
Tap the microphone button in the middle and start talking — don't worry about pauses or “ums”. Tap Stop when you're done.
If the dots aren't moving, your microphone may be off — check the app's microphone permission.
Step 4. Improve your text
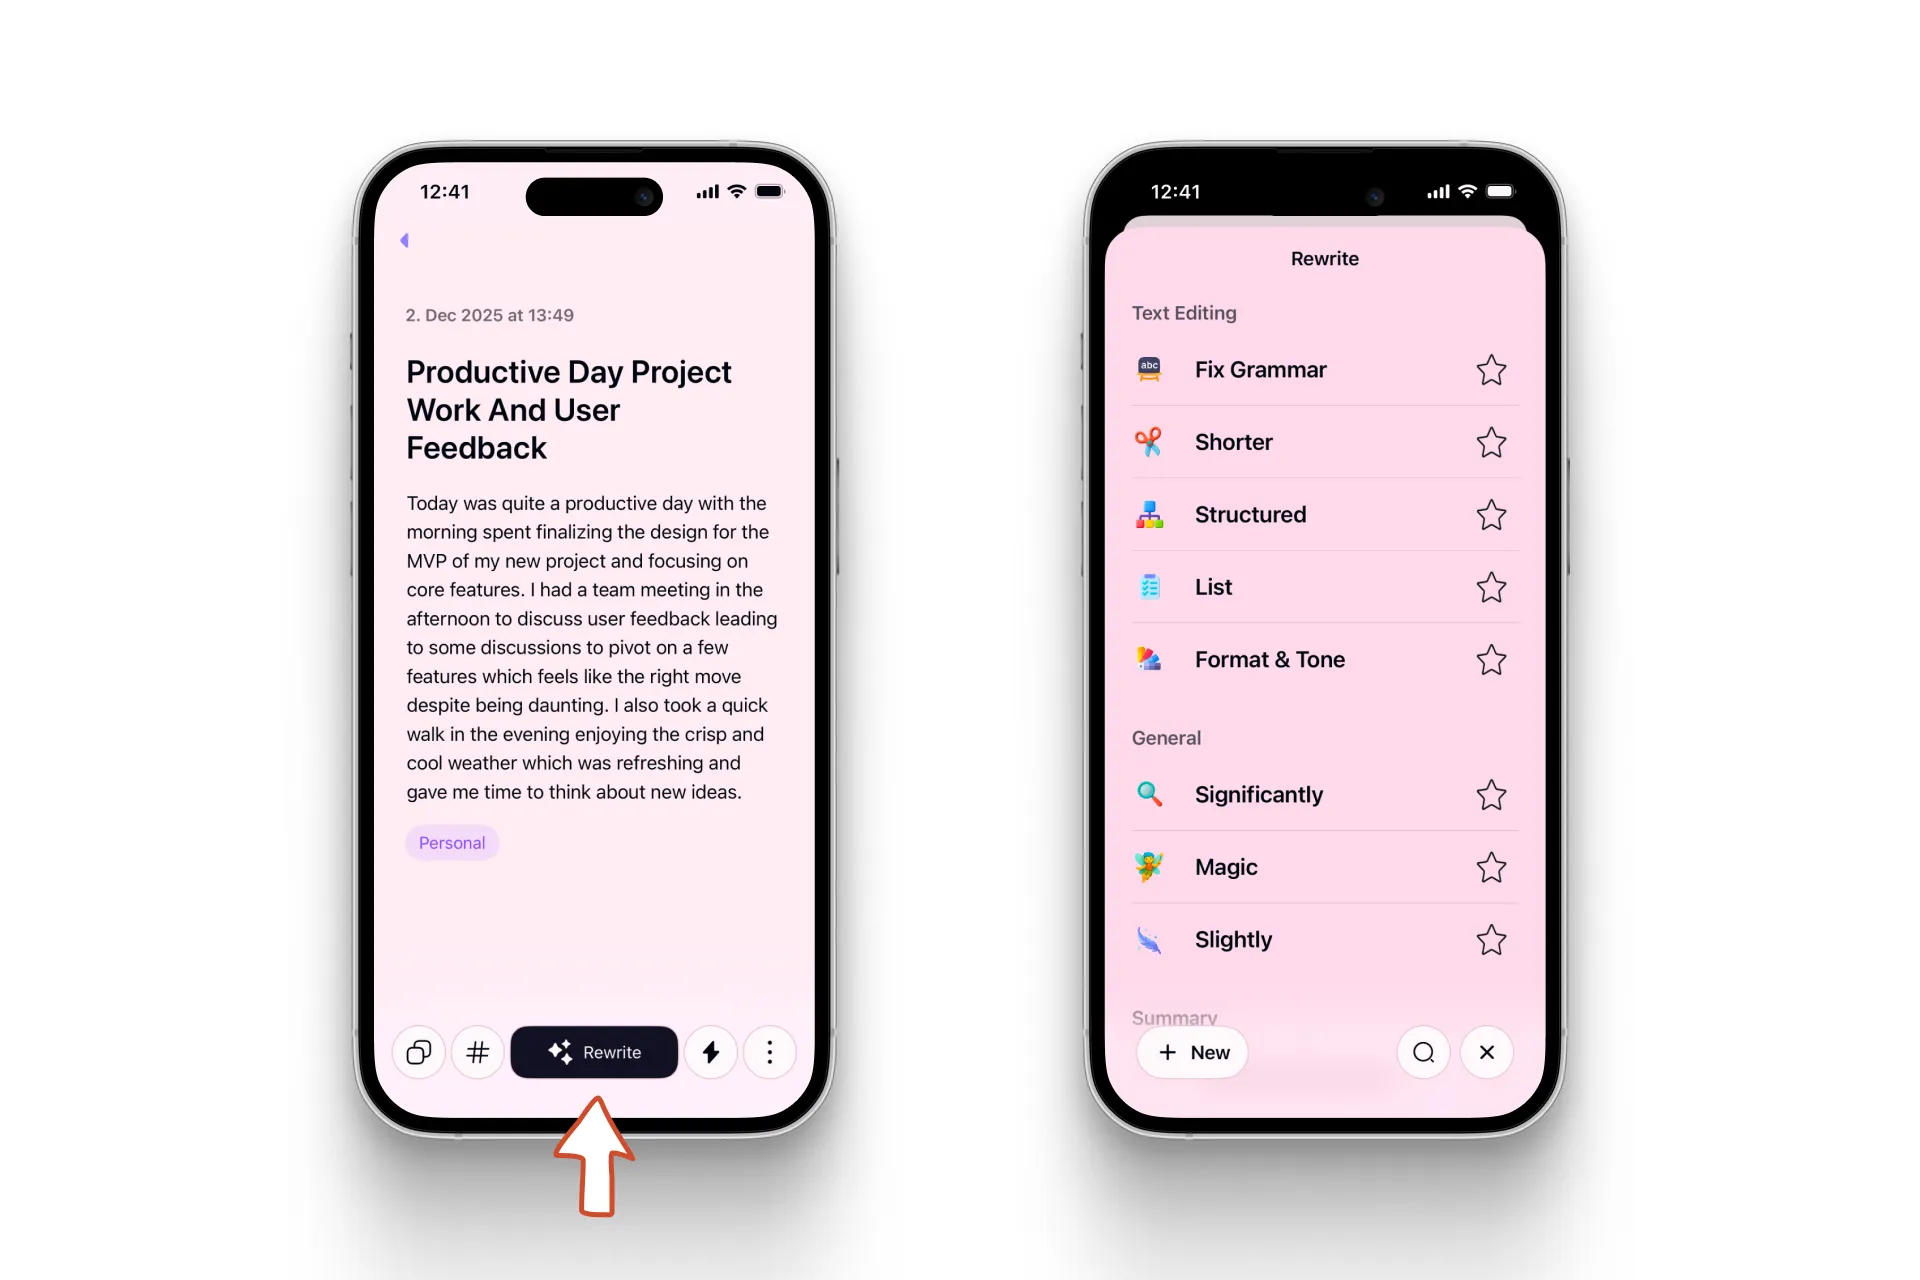
After Stop, Letterly transcribes your voice and opens the note. Tap the big Rewrite button and pick an option — e.g. Significantly fully rewrites it, Facebook Post turns it into a post. Wait a few seconds for the polished version.
- Swipe left / right to switch between the original and your rewritten versions.
- Tap the star next to an option to pin it to the top for next time.
Want more options? Tap + New:
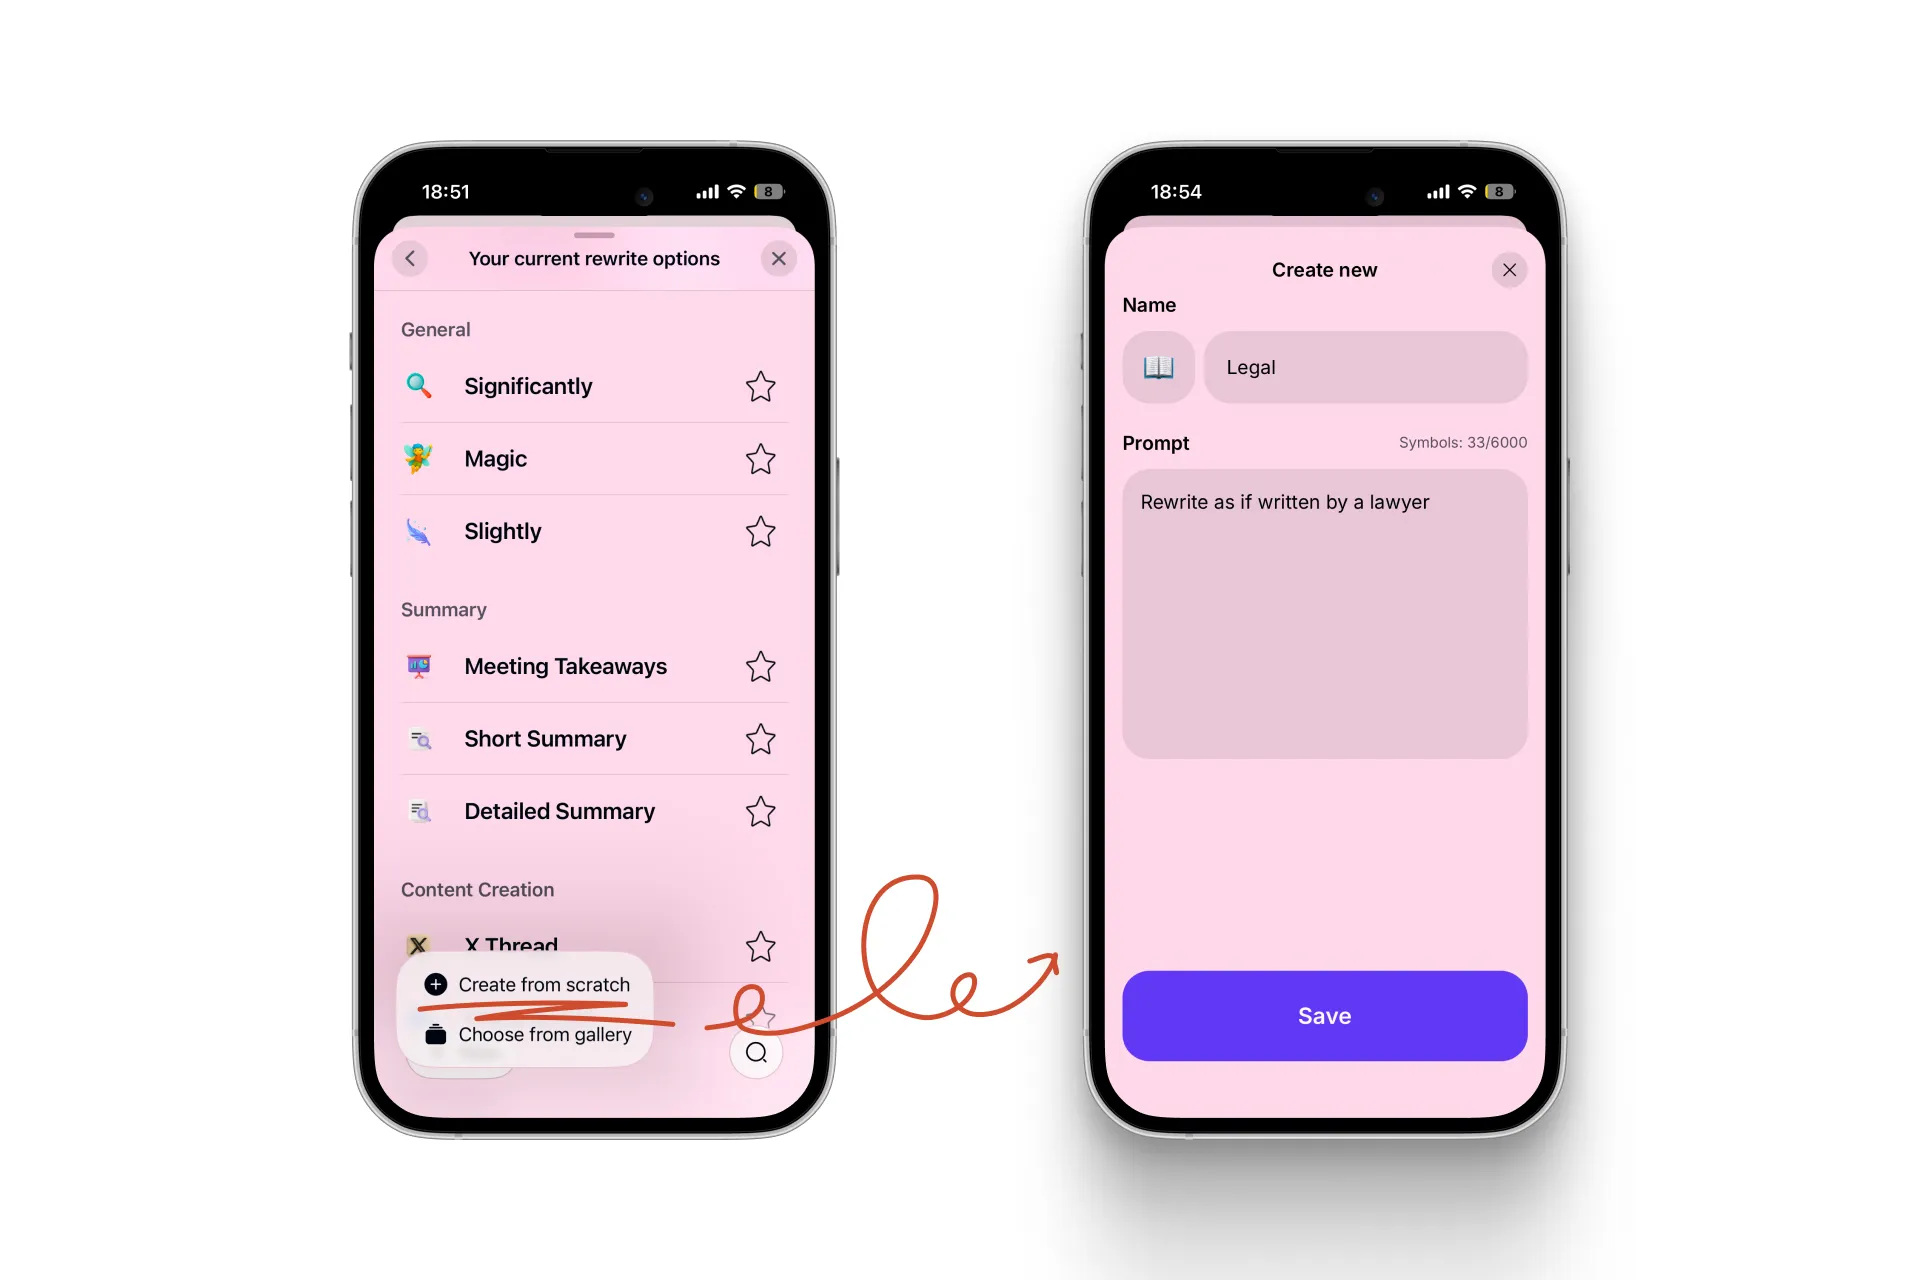
Create from scratch — a fully custom rewrite option, e.g. “Rewrite as if written by a lawyer”, saved for future use.
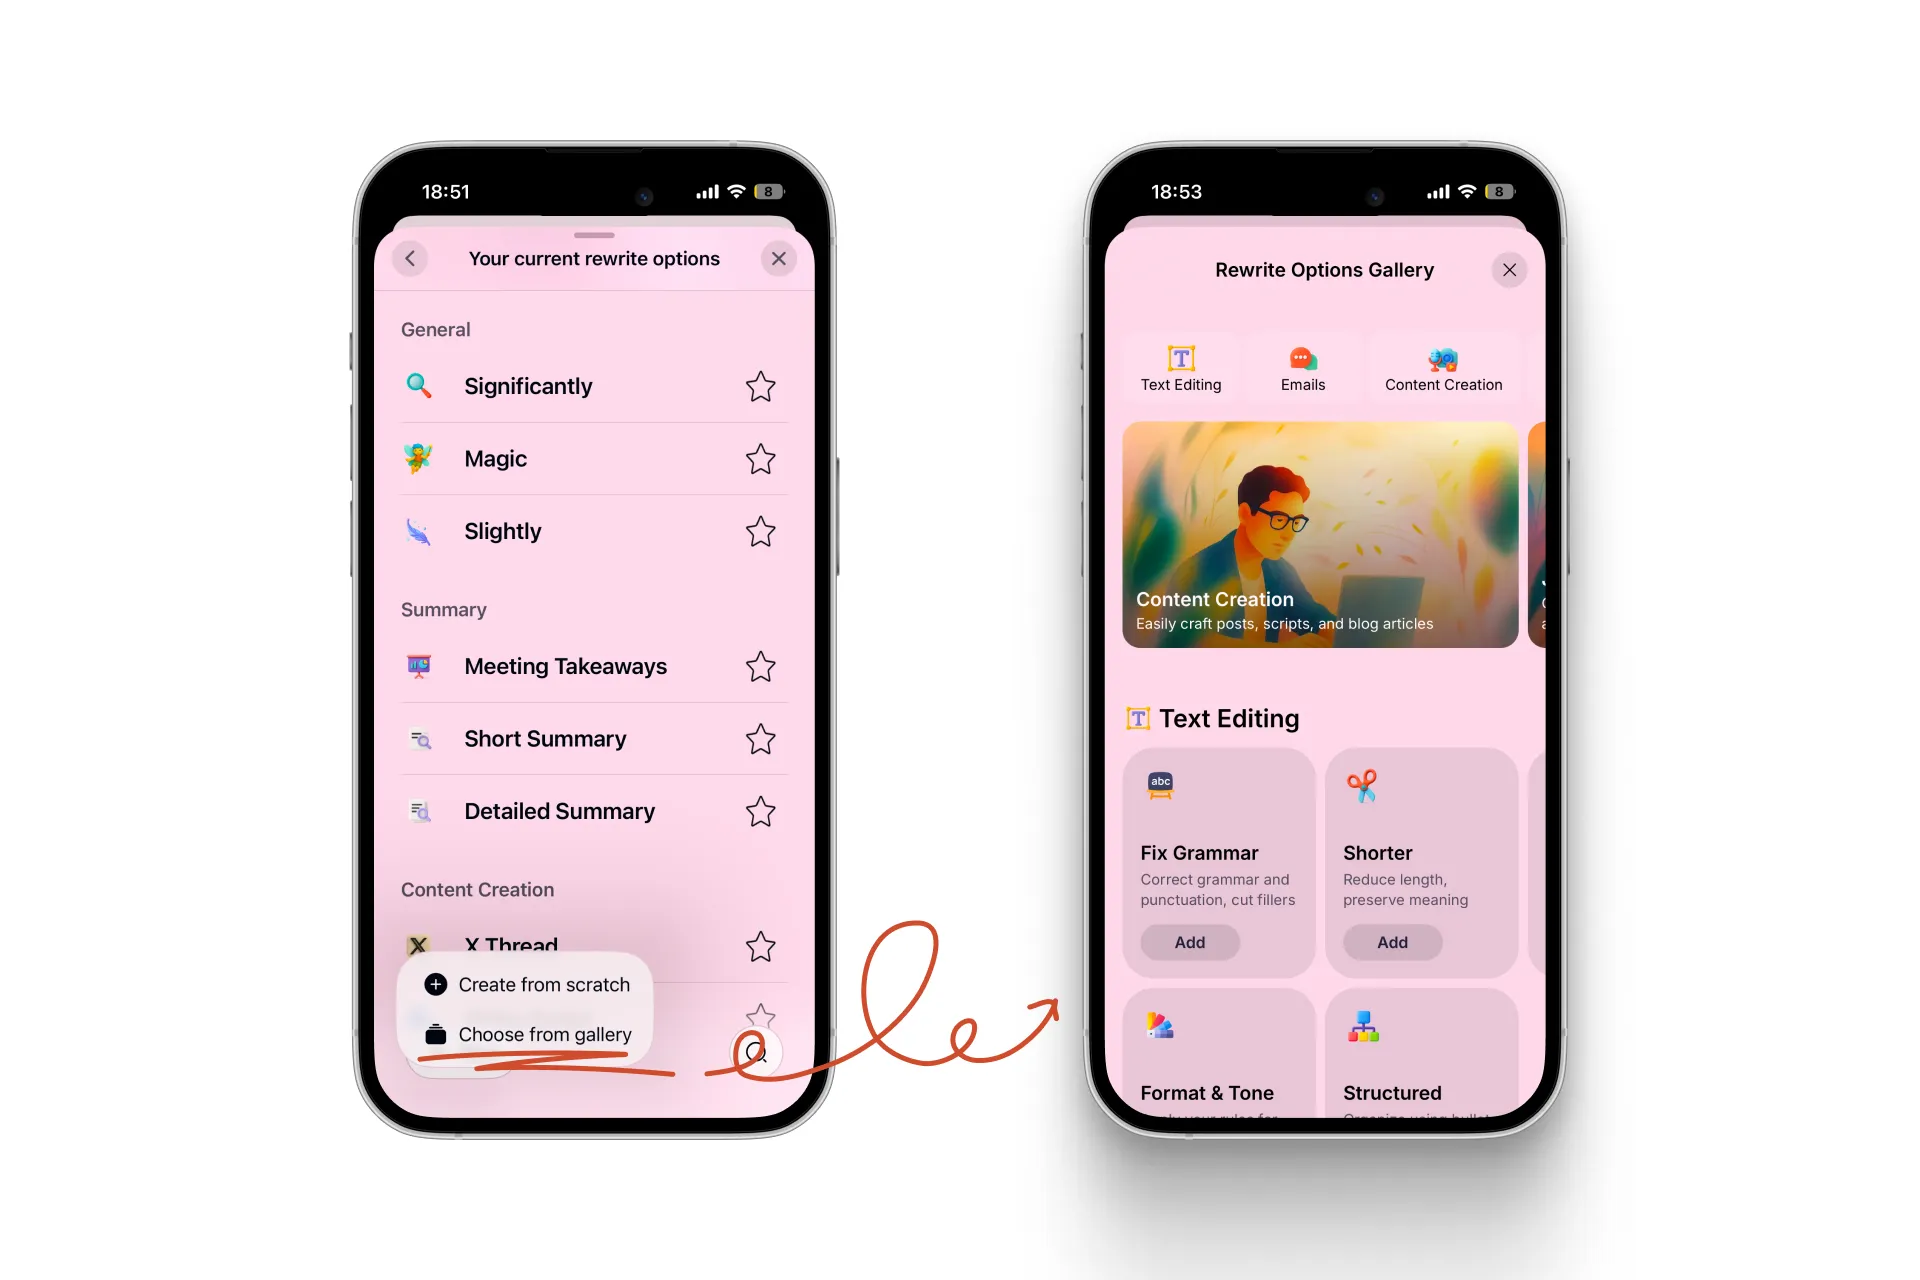
Choose from gallery — the Rewrite Options Gallery; tap Add on any option to add it to your list.
Part 2
Four screens you need to know
Screen 1. Before recording
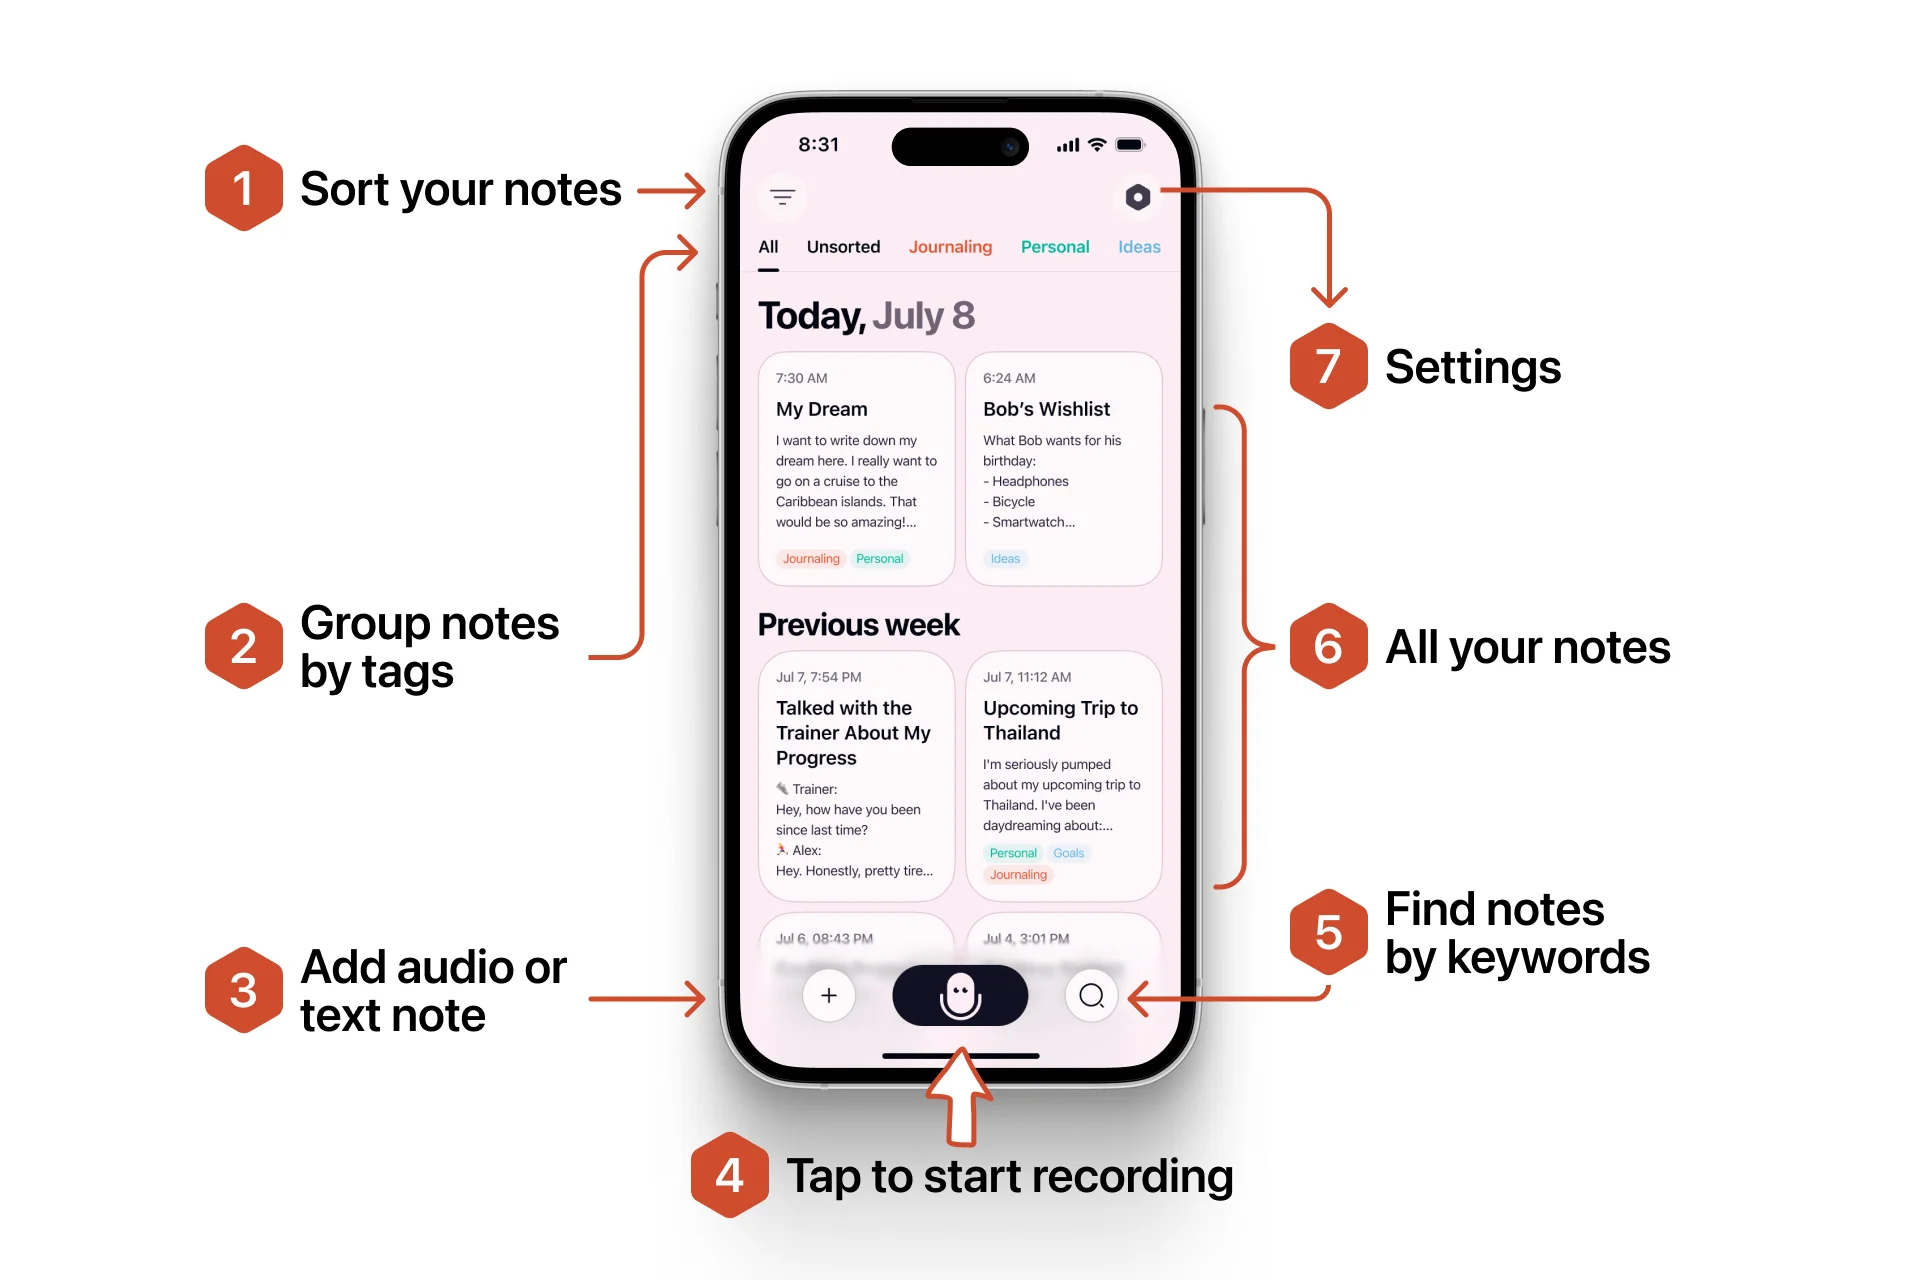
- Sort notes by last update or creation date.
- Group by tags (e.g. Content, Clients, Personal).
- Add audio or text note — type a note, or upload an audio file to transcribe.
- Tap to record a new note.
- Search notes by keyword.
- All your notes live here.
- Settings — account and preferences.
Screen 2. While recording
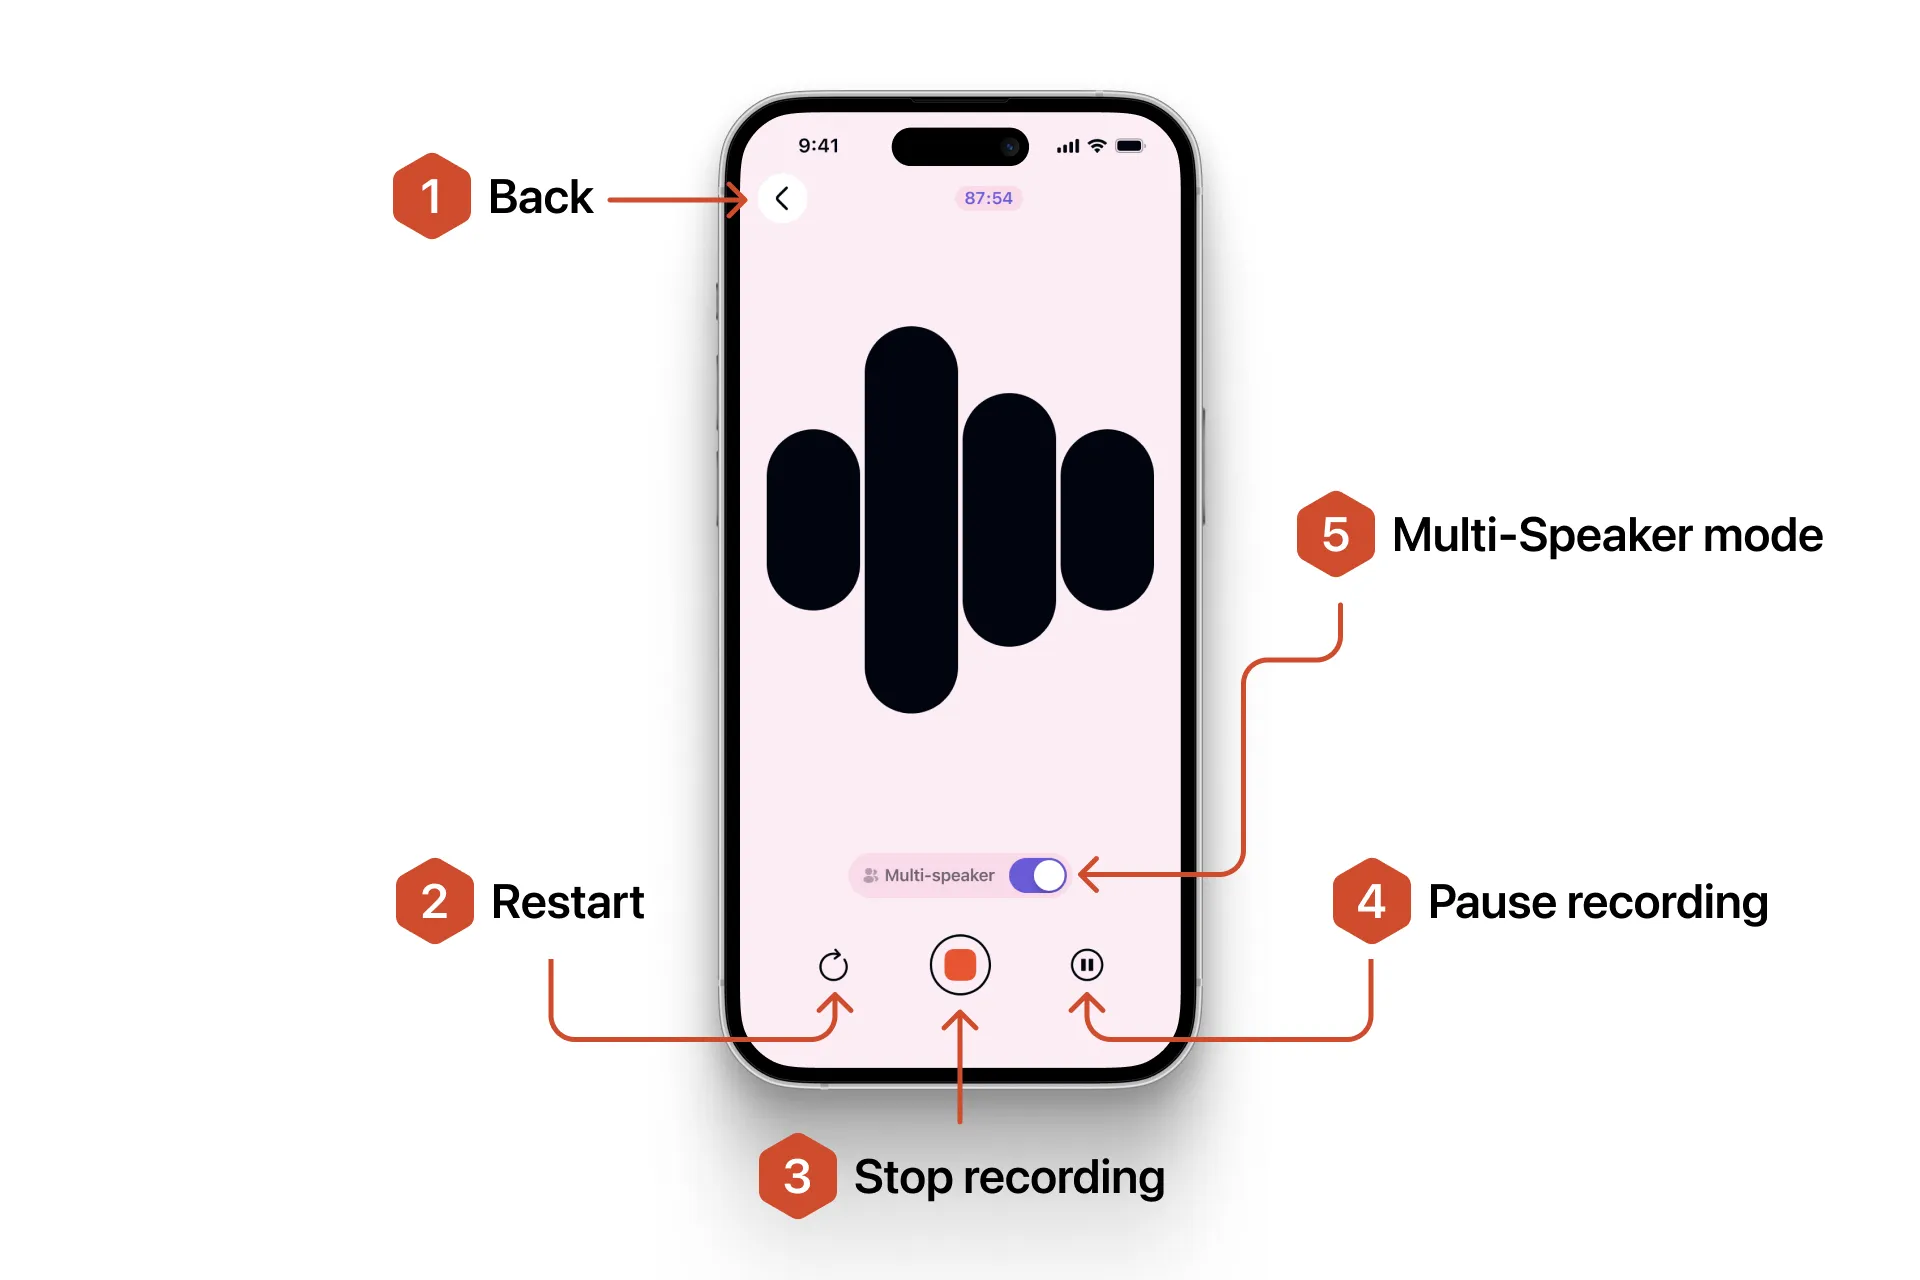
- Back — returns to the previous screen (the note won't be saved).
- Stop — ends the recording.
- Restart — starts over (what you recorded won't be saved).
- Pause — pause to think, tap again to resume.
- Multi-speaker mode — separates voices by speaker for interviews and meetings.
Screen 3. After recording
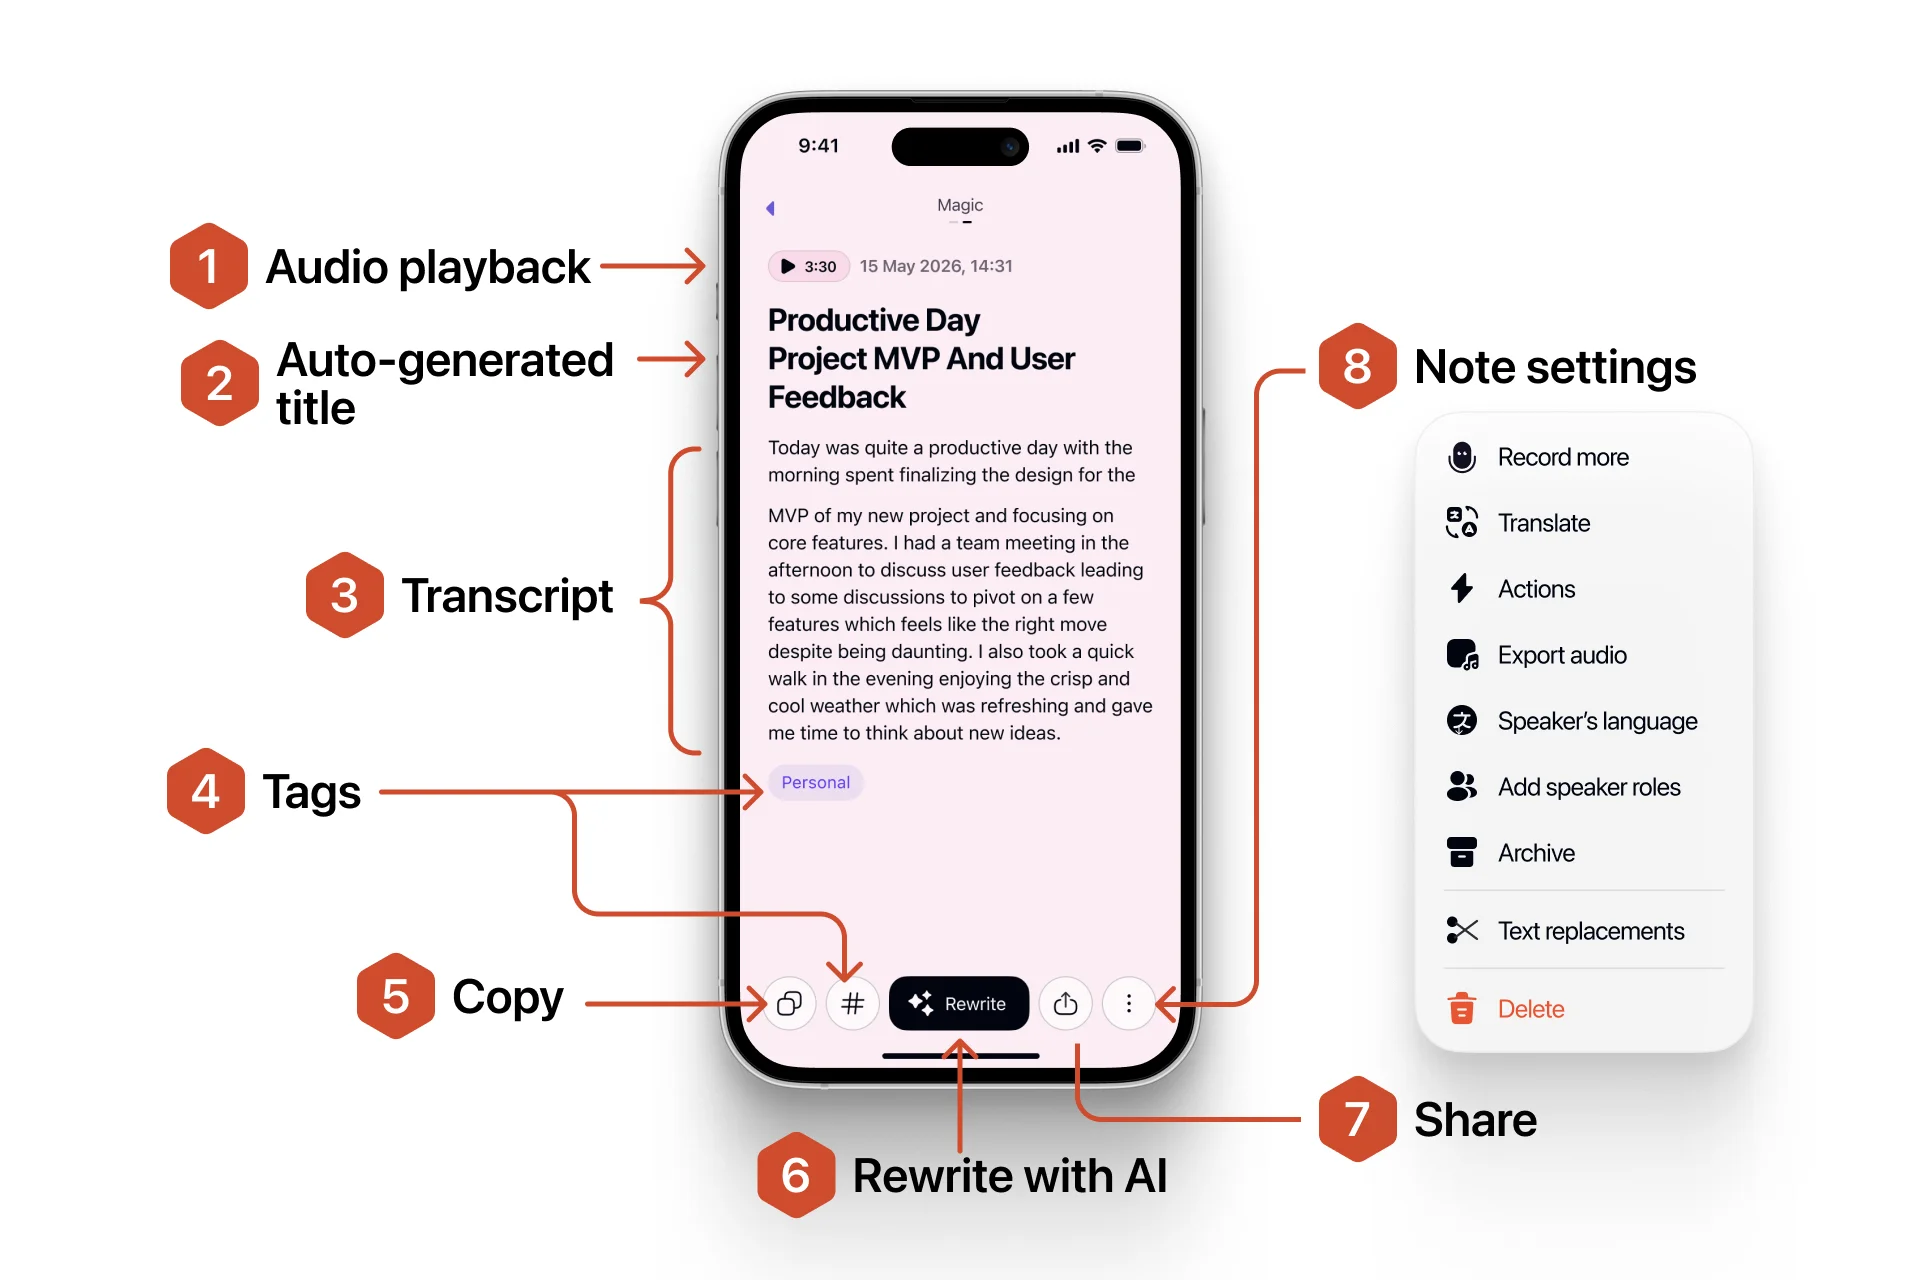
- Audio playback — listen to your original recording.
- Auto-generated title.
- Transcript — the full text.
- Tags — none, one, or many.
- Copy — use your note anywhere.
- Rewrite with AI.
- Actions — connect to Google Docs, Notion, etc. via Zapier / webhooks.
- Note settings (⋯): Record more · Translate · Share with · Export audio · Speaker's language · Add / remove speaker roles · Archive · Text replacements.
Screen 4. Account settings
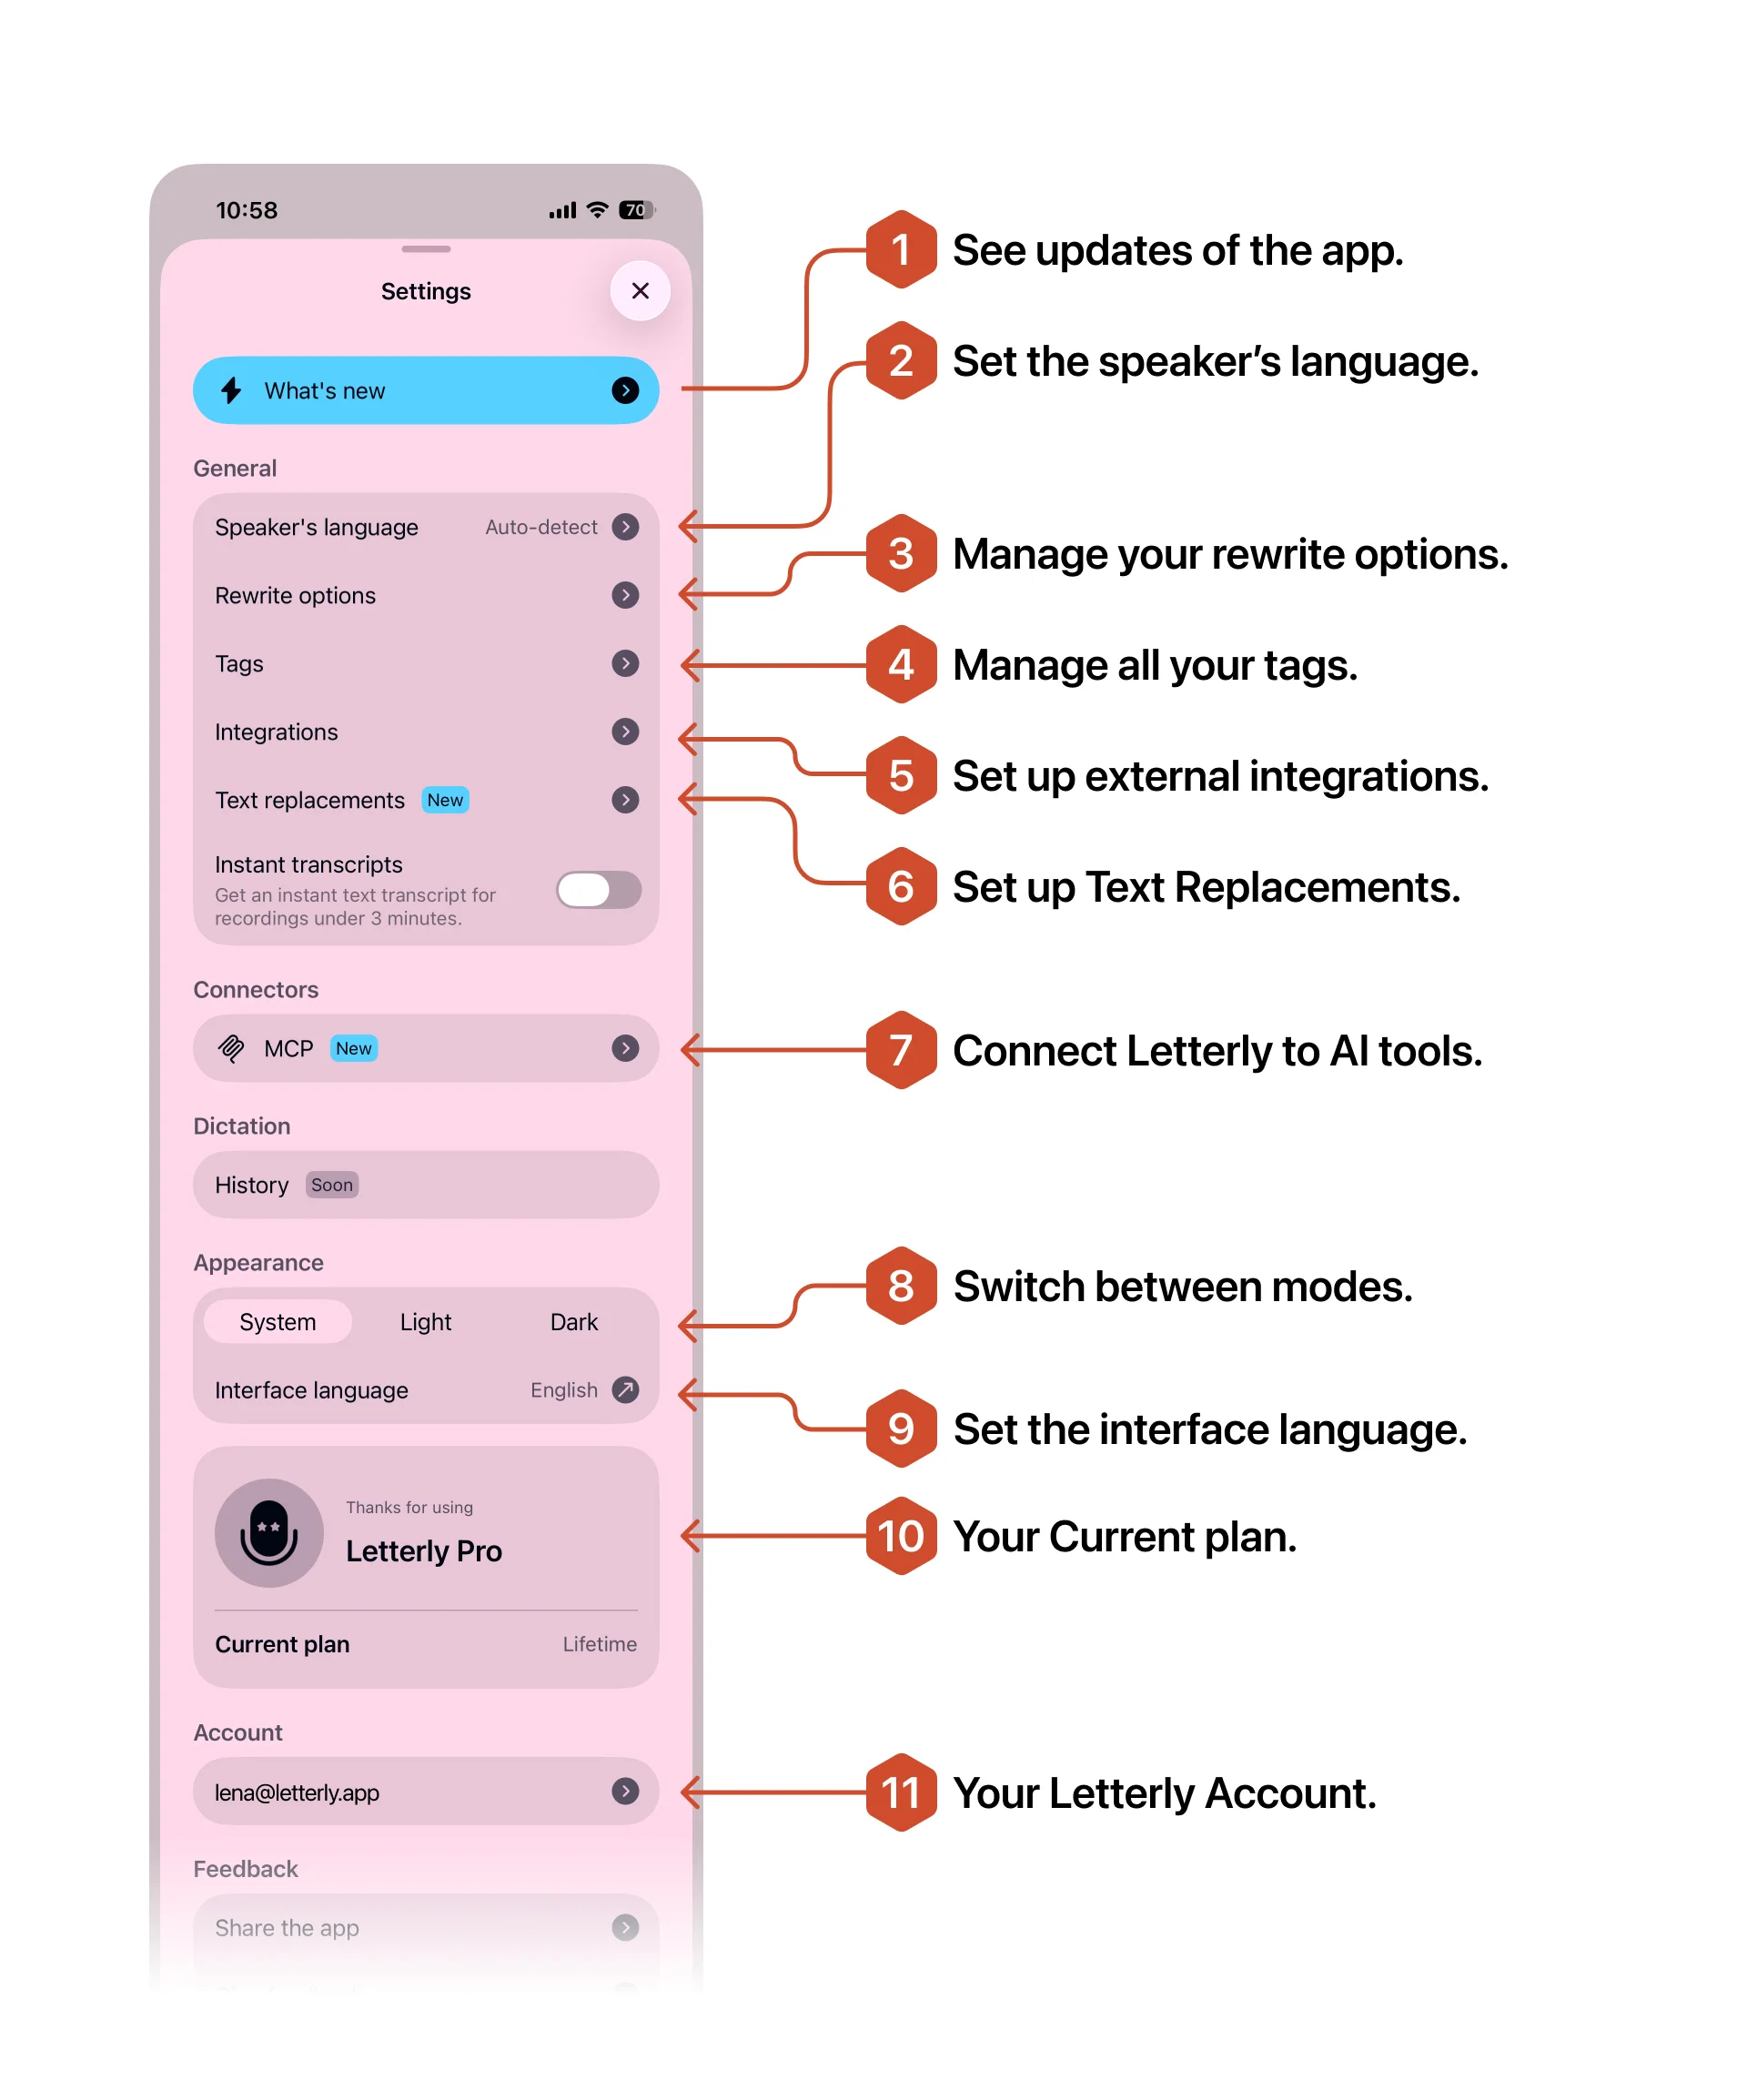
Tap the cogwheel in the top-right corner:
- See app updates.
- Set the speaker's language (applies to future notes).
- Manage rewrite options — pin, search, or create.
- Manage all your tags.
- Set up integrations (Zapier / webhooks).
- Set up Text Replacements.
- Connect Letterly to AI tools (Claude, ChatGPT).
- Light / Dark / System mode.
- Set the interface language.
- Current plan — plan, renewal date, and where it's managed.
- Letterly Account — the email you're logged in with (should show Letterly Pro if it's correct).
You did it! 🎉 Run into something? See Troubleshooting.
We have not written the full Android walkthrough yet — sorry about that. The interface is almost the same everywhere, so the iPhone tab will get you through it.
Download Letterly
Get Letterly for Android from Google Play.
The core flow is the same on every platform: record → get your transcript → tap Rewrite → share or copy.
Written guide for Android is coming soon.
We have not written the full Mac walkthrough yet — sorry about that. The interface is almost the same everywhere, so the iPhone tab will get you through it.
Download Letterly
Get Letterly for Mac from the Mac App Store.
The core flow is the same on every platform: record → get your transcript → tap Rewrite → share or copy.
Written guide for Mac is coming soon.
We have not written the full Windows walkthrough yet — sorry about that. The interface is almost the same everywhere, so the iPhone tab will get you through it.
Download Letterly
Get Letterly for Windows from the Microsoft Store.
The core flow is the same on every platform: record → get your transcript → tap Rewrite → share or copy.
Written guide for Windows is coming soon.
We have not written the full Web walkthrough yet — sorry about that. The interface is almost the same everywhere, so the iPhone tab will get you through it.
Download Letterly
Open Letterly in any browser at web.letterly.app — no install needed.
The core flow is the same on every platform: record → get your transcript → tap Rewrite → share or copy.
Written guide for Web is coming soon.